
You know that moment when you pull a perfectly golden apple cobbler from the oven, and the sweet aroma of cinnamon and baked apples fills your kitchen? That’s what we’re going to achieve today! As someone who’s been baking apple cobblers for over 15 years (and trust me, I’ve had my share of disasters!), I’m excited to share every single detail that makes the difference between a good cobbler and an absolutely incredible one. Did you know that the average American consumes about 27 pounds of apples per year? Well, after you master this recipe, your family might just double that number!
Essential Ingredients for Perfect Apple Cobbler
Let me tell you about the time I tried making an apple cobbler with Red Delicious apples – big mistake! I learned the hard way that not all apples are created equal when it comes to baking. After countless tests and taste experiments, I’ve nailed down exactly what you need for cobbler perfection.
For the filling:
- 6 cups of sliced Granny Smith apples (about 6-7 medium apples)
- 2-3 Honeycrisp apples for balanced sweetness
- ¾ cup granulated sugar
- 2 tablespoons all-purpose flour
- 1 teaspoon ground cinnamon
- ¼ teaspoon ground nutmeg
- ¼ teaspoon salt
- 2 tablespoons lemon juice
For the topping:
- 2 cups all-purpose flour
- 1 cup cold unsalted butter
- ½ cup granulated sugar
- ½ cup brown sugar
- 2 teaspoons baking powder
- ½ teaspoon salt
- ⅔ cup hot water
Here’s something I wish someone had told me years ago: the temperature of your butter is absolutely crucial! I remember one disastrous Christmas when I was in such a hurry that I used warm, mushy butter. The result? A tough, chewy topping that was more like a rubber mat than a tender cobbler crust!
The magic happens when you use butter straight from the fridge and cut it into small cubes. This creates those heavenly pockets of butteriness that make your cobbler topping melt in your mouth. And please, please don’t use margarine – I tried that during my college “budget-friendly” phase, and let’s just say some experiments aren’t worth repeating!
Equipment and Preparation Steps
You might be surprised to learn that I actually prefer a simple 9×13 inch baking dish over anything fancy. Trust me, I went through my “must have every specialized baking dish” phase! After spending way too much money on specialty cobbler dishes, I discovered that the humble rectangular baking dish produces the perfect ratio of filling to topping every single time.
Essential equipment you’ll need:
- 9×13 inch baking dish
- Sharp knife for apple slicing
- Large mixing bowls (2)
- Pastry cutter or two forks
- Measuring cups and spoons
- Apple peeler (optional but recommended)
Before you start, position your oven rack in the center – I learned this the hard way after one too many burnt bottoms and underdone tops! Preheat your oven to 375°F (190°C). This temperature is absolutely perfect for achieving that golden-brown crust while ensuring your apples cook through completely.
Pro tip: I always place a sheet pan on the bottom rack to catch any potential overflow. Nothing ruins a perfect baking session quite like having to clean the oven afterward!
The Ultimate Apple Filling Technique
Let me share a game-changing discovery I made about apple thickness. After years of inconsistent results, I finally realized that the key is uniform slicing – about ¼ inch thick, no thinner, no thicker. You want them thick enough to hold their shape but thin enough to become tender.
Here’s my foolproof filling method:
- Peel and slice your apples uniformly (I aim for ¼ inch thickness)
- Toss them immediately with lemon juice to prevent browning
- In a separate bowl, mix your dry ingredients (sugar, flour, spices)
- Combine everything and let it sit for 10-15 minutes
Now, here’s a controversial take: I don’t pre-cook my filling. I know some bakers swear by it, but after testing both methods extensively, I’ve found that raw filling creates the perfect texture – tender but not mushy apples with just the right amount of bite.
A quick note about spices: please, please measure them! I used to just sprinkle them in freestyle-style until one memorable Thanksgiving when my cobbler was so heavily spiced it tasted like a scented candle. Not exactly the reaction you want from your dinner guests!
Mastering the Cobbler Topping
The topping is where so many cobblers go wrong, but I’m going to help you nail it every single time. You know what’s funny? I used to think making the perfect cobbler topping was all about muscle power – I’d work that butter into the flour until my arms were sore! Turns out, less really is more.
Here’s my never-fail method:
- Start with COLD butter cut into small cubes
- Mix all dry ingredients thoroughly
- Cut in butter until mixture resembles coarse crumbs (about the size of peas)
- Add hot water and stir just until combined
The biggest mistake I see people make (and boy, did I make it myself for years!) is overworking the dough. You want to stop mixing as soon as everything comes together. Those little lumps of butter? They’re your friends! They create steam pockets while baking, resulting in that perfectly tender, flaky topping.
Baking Tips and Timing
After ruining countless cobblers by either underbaking or overbaking them, I’ve finally cracked the code on perfect timing. The magic number? 45-50 minutes at 375°F. But here’s the thing – you can’t just set it and forget it!
Visual cues for perfect doneness:
- Topping should be golden brown, not just light tan
- Filling should be bubbling around the edges
- A knife inserted into the center should meet tender apples
- The entire surface should have a slight shine
I remember one time when I was hosting a dinner party and got distracted by a phone call. I completely forgot about my cobbler until I smelled that distinct “well, that’s overdone” aroma. Now I always set two timers – one on my phone and one on the oven. Better safe than sorry!
Serving and Storage Guide for Apple Cobbler
Let’s talk about serving temperature – this is crucial! I used to serve my cobbler piping hot, straight from the oven, until my aunt (a professional baker) taught me better. You want to let it cool for at least 20-30 minutes. This allows the filling to set and makes serving much easier.
For storing leftovers (if you have any!):
- Cool completely before covering
- Store at room temperature for up to 2 days
- Refrigerate for up to 5 days
- Reheat individual portions in the microwave for 30 seconds
- For whole leftovers, reheat in a 350°F oven for 15-20 minutes
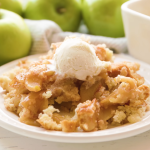
The best way to serve apple cobbler? I love it with a scoop of vanilla ice cream, but here’s a secret: try it for breakfast the next day with a dollop of Greek yogurt. It’s absolutely divine, and hey, it’s got fruit in it, right?
Making ahead? You can prepare the filling and topping separately up to 24 hours in advance. Store the filling in the refrigerator and the dry topping mixture at room temperature. Just don’t add the hot water to the topping until you’re ready to bake.
Common Troubleshooting Tips
I’ve received hundreds of questions about apple cobbler mishaps over the years, so let me address the most common issues you might encounter:
Runny Filling Solutions
- If your filling is too runny, add 1 extra tablespoon of flour to your apple mixture
- Alternatively, mix 1 tablespoon of cornstarch with your dry ingredients
- Let the cobbler rest for 30-45 minutes after baking to allow filling to set
- Make sure you’re not using overripe apples, which release more liquid
Soggy Bottom Prevention
- Sprinkle 2 tablespoons of flour on the bottom of your baking dish before adding filling
- If using frozen apples, thaw and drain them completely
- Consider blind baking the bottom crust for 10 minutes if you’re adding one
- Use a glass baking dish to monitor bottom browning
Dough Problems Solved
- If your topping is too dry: Add water 1 tablespoon at a time
- If too wet: Sprinkle in flour 1 tablespoon at a time
- For crumbly topping: Ensure butter is cold and pea-sized
- For tough topping: Avoid overmixing and check your oven temperature
Seasonal Variations
One thing I love about apple cobbler is how versatile it is throughout the year. Here are my favorite seasonal adaptations:
Spring
- Add 1 cup of fresh strawberries to the filling
- Mix in 1 teaspoon of fresh lemon zest
- Top with mint-infused whipped cream
- Reduce sugar if using sweeter spring apples
Summer
- Include 1 cup of fresh peaches
- Add ¼ teaspoon of lavender (trust me!)
- Serve with lemon sorbet
- Reduce baking time by 5 minutes due to juicier fruit
Fall
- Add ½ cup of fresh cranberries
- Increase cinnamon to 1½ teaspoons
- Mix in ¼ cup of toasted pecans
- Drizzle with maple syrup before serving
Winter
- Add ¼ teaspoon of cardamom
- Mix in ¼ cup of dried cherries
- Top with brandy-spiked whipped cream
- Increase spices by 25% for stronger flavor
Dietary Modifications
After years of requests, I’ve developed these reliable substitutions:
Gluten-Free Version
- Replace all-purpose flour with 1:1 gluten-free baking blend
- Add ¼ teaspoon xanthan gum if your blend doesn’t include it
- Increase liquid by 2 tablespoons
- Let batter rest for 15 minutes before baking
Sugar-Free Adaptation
- Replace sugar with monk fruit sweetener (1:1 ratio)
- Add ¼ teaspoon pure stevia extract
- Increase cinnamon to 1½ teaspoons
- Reduce baking time by 5 minutes
Vegan Options
- Replace butter with cold coconut oil
- Use plant-based milk for moisture
- Add 1 tablespoon apple cider vinegar
- Increase salt to ¾ teaspoon
Pro Tips for Special Occasions
When making this cobbler for special events, here are some tricks I’ve learned:
Potlucks
- Make 1.5x the topping recipe for crowd appeal
- Transport in the baking dish, wrapped in foil
- Bring ice cream packed in a cooler
- Pack toppings separately
Holidays
- Double the recipe for large gatherings
- Prepare components the day before
- Use festive cookie cutters for vented shapes
- Consider individual ramekins for elegant serving
For Bake Sales
- Use disposable aluminum pans
- Make mini versions in muffin tins
- Include reheating instructions
- Package with vanilla bean ice cream suggestions
Kitchen Tools That Make a Difference
Over the years, I’ve found these tools incredibly helpful:
Must-Have Tools
- Apple peeler/corer/slicer combo ($20-30)
- Pastry blender ($10-15)
- Digital kitchen scale ($15-25)
- Instant-read thermometer ($10-20)
Nice-to-Have Tools
- Silicone pastry mat
- Danish dough whisk
- Apple corer
- Pie shield
Storage and Freezing Guide
Let me expand on storage options:
Room Temperature
- Cover with foil or plastic wrap
- Best eaten within 2 days
- Keep away from direct sunlight
- Don’t cover until completely cool
Refrigerator
- Store in airtight container
- Keeps for up to 5 days
- Wrap individual portions
- Reheat before serving
Freezer
- Freeze unbaked for up to 3 months
- Wrap in plastic, then foil
- Label with date and instructions
- Thaw overnight in refrigerator
Make-Ahead Tips
- Prepare filling up to 24 hours ahead
- Mix dry ingredients in advance
- Store components separately
- Allow 1 hour to come to room temperature
Conclusion
After years of trial and error, countless apple peels, and more than a few smoke detector incidents, I can honestly say that this apple cobbler recipe is absolutely foolproof. Remember, the key to success lies in those seemingly small details – uniform apple slices, cold butter, and patience during baking.
Don’t be discouraged if your first attempt isn’t perfect! Every oven is different, and part of the joy of baking is adapting recipes to make them your own. I’d love to hear about your cobbler adventures – drop a comment below with your results or any creative twists you added to the recipe.
And here’s one final tip: keep those apple peels! Toss them with a bit of cinnamon sugar and bake them separately for a crispy, healthy snack. It’s my favorite baker’s treat, and a great way to reduce food waste while you create your masterpiece.
Ready to start baking? I can’t wait to hear how your cobbler turns out. Happy baking, friends!
Apple Cobbler
Ingredients
- 6 medium apples Granny Smith, Golden Delicious, or other good baking apple, peeled and cut into chunks ¼ inch thick
- 1 cup water or apple juice
- ⅓ cup brown sugar packed
- 1 Tablespoon cornstarch
- 1 Tablespoon lemon juice
- ½ teaspoon vanilla extract
- 1 teaspoon ground cinnamon
- ½ teaspoon ground nutmeg
- ⅛ teaspoon salt
For the batter:
- 1 cup all-purpose flour
- 1 cup granulated sugar
- 2 teaspoons baking powder
- ¼ teaspoon salt
- ¾ cup milk
- 5 Tablespoons butter melted
- ground cinnamon for topping
Instructions
- Preheat the oven to 350°F and lightly grease a 9×13 inch pan with cooking spray.
- In a saucepan, combine brown sugar, water, cornstarch, lemon juice, vanilla, cinnamon, nutmeg, and salt. Stir in the apples and cook over medium heat for 3-5 minutes, stirring occasionally.
- Pour the apple mixture into the prepared pan.
- In a large bowl, mix together the flour, sugar, baking powder, and salt. Stir in the milk and melted butter until just combined.
- Pour the batter over the apples in the pan. Lightly sprinkle with cinnamon.
- Bake for 38-40 minutes, or until a toothpick inserted into the topping comes out clean.
- Let the cobbler cool for at least 15 minutes before serving. Serve warm, with vanilla ice cream if desired.
- Store leftovers covered in the refrigerator for up to 4 days.