
Did you know that the average American consumes about 10.7 pounds of apples each year? That’s a lot of apples! But let me tell you, those apples would taste even better with a delicious homemade caramel dip. Trust me, I’ve been there – munching on plain apple slices, thinking they’re fine on their own. But then I discovered the joy of homemade caramel apple dip, and let me tell you, it’s a game-changer!
I remember the first time I made caramel apple dip from scratch. It was a disaster! The caramel crystallized, and I almost gave up. But boy, am I glad I didn’t! After years of trial and error (and a few burnt pans), I’ve mastered the art of homemade caramel apple dip. And now, I’m excited to share all my secrets with you!
In this guide, we’ll dive deep into the world of caramel apple dips. I’ll walk you through everything from basic recipes to fancy variations, and even share some healthier alternatives for those of us watching our waistlines. So, grab an apple (or maybe a spoon – I won’t judge!), and let’s get started on this sweet journey!
The Basics of Homemade Caramel Apple Dip:
Alright, let’s start with the basics. What exactly is caramel apple dip? Well, it’s pretty much heaven in a bowl if you ask me! But to get technical, it’s a smooth, creamy dip made primarily from caramelized sugar, butter, and cream. It’s designed to complement the tartness of apples, creating a perfect balance of flavors that’ll make your taste buds do a happy dance.
Now, caramel apples have been around for ages – since the 1950s, to be exact. But somewhere along the line, someone (probably a genius with a sweet tooth) thought, “Hey, why don’t we make this easier to eat?” And voila! Caramel apple dip was born.
I’ll never forget the first time I had caramel apple dip at a fall festival. It was love at first bite! The way the sweet, buttery caramel coated the crisp apple slice… it was magical. From that moment on, I was hooked.
But why bother making your own caramel apple dip when you can buy it at the store? Oh, let me count the ways! First off, homemade just tastes better. Period. You can control the ingredients, adjust the sweetness to your liking, and avoid any weird preservatives. Plus, there’s something incredibly satisfying about making your own dip. It’s like edible alchemy – you’re turning simple ingredients into gold (well, golden-brown, but you get the idea).
Not to mention, homemade caramel apple dip makes your house smell amazing. It’s better than any scented candle, I promise you that. And let’s not forget the bragging rights. Whip out a bowl of homemade caramel apple dip at your next gathering, and watch your friends’ jaws drop. Trust me, I’ve been there, and it feels good!
Essential Ingredients for Homemade Caramel Apple Dip:
Now that we’ve covered the basics, let’s talk ingredients. The beauty of homemade caramel apple dip is that you don’t need a pantry full of fancy stuff. In fact, you probably have most of these ingredients in your kitchen right now!
The core ingredients for a classic caramel apple dip are:
- Sugar: This is the star of the show. When heated, sugar transforms into that gorgeous amber liquid we know and love as caramel.
- Butter: Adds richness and helps create that smooth, creamy texture.
- Cream: This is what gives your dip that luscious, spoonable consistency.
Now, you might be thinking, “That’s it?” Well, not quite. While these three ingredients will give you a basic caramel dip, there are a few optional add-ins that can take your dip from good to great:
- Vanilla extract: A splash of vanilla adds depth and warmth to your caramel.
- Salt: A pinch of salt enhances the caramel flavor and balances the sweetness.
- Corn syrup: This is optional, but it can help prevent crystallization in your caramel.
When it comes to ingredients, quality matters. I learned this the hard way when I once used some old, rock-hard brown sugar in my caramel dip. Let’s just say it wasn’t my finest culinary moment! Here are some tips I’ve picked up over the years:
- Use fresh, soft brown sugar if your recipe calls for it.
- Opt for unsalted butter so you can control the salt content.
- Heavy cream works best, but half-and-half can work in a pinch.
- If you’re using vanilla, spring for pure vanilla extract if you can. The flavor difference is noticeable!
Remember, these ingredients are the building blocks of your caramel apple dip. The better your ingredients, the better your dip will be. So don’t be afraid to splurge a little on high-quality components. Your taste buds will thank you!
Classic Homemade Caramel Apple Dip Recipe:
Alright, folks, it’s time to roll up our sleeves and get cooking! This is my go-to recipe for classic caramel apple dip. It’s simple, foolproof (well, mostly), and absolutely delicious. Here’s what you’ll need:
- 1 cup granulated sugar
- 6 tablespoons unsalted butter, cut into pieces
- 1/2 cup heavy cream
- 1/4 teaspoon salt
- 1 teaspoon vanilla extract (optional, but recommended)
Now, let’s make some caramel magic!
- First things first, gather all your ingredients and have them ready. Trust me, once you start cooking, things move fast!
- In a medium saucepan (I use one with high sides to prevent any bubbling over), spread the sugar in an even layer. Heat it over medium-high heat.
- Now, this is where patience comes in. As the sugar heats, it’ll start to melt around the edges. Resist the urge to stir! I know it’s tempting, but stirring can cause the sugar to crystallize. Instead, gently swirl the pan to help the sugar melt evenly.
- Once all the sugar has melted and turned a deep amber color (it should look like the color of a penny), it’s time to add the butter. Be careful here – the mixture will bubble up vigorously. Stir until the butter is completely melted.
- Slowly pour in the cream, stirring constantly. Again, be careful of the bubbling! Cook for about a minute, stirring constantly, until the mixture is smooth and slightly thickened.
- Remove from heat and stir in the salt and vanilla (if using). Let it cool for a few minutes – it’ll thicken as it cools.
And there you have it! Your very own homemade caramel apple dip.
Now, let’s talk about achieving that perfect consistency. The key is to cook the caramel until it reaches the right temperature. If you have a candy thermometer, aim for about 350°F (175°C) before adding the butter. If you don’t have a thermometer, no worries! Just watch the color closely. You want it to be a deep amber – think of a shiny new penny.
If your dip ends up too thin, you can cook it a bit longer to thicken it up. If it’s too thick, try stirring in a little extra cream while it’s still warm.
Troubleshooting tip: If your sugar crystallizes (looks grainy or clumpy), don’t panic! It’s happened to all of us. You can try to save it by adding a splash of water and reheating slowly, stirring until the crystals dissolve. But honestly? Sometimes it’s easier to just start over. Consider it a learning experience!
Remember, making caramel is part science, part art. It might take a few tries to get it just right, but that’s part of the fun. And hey, even if it’s not perfect, I bet it’ll still taste pretty darn good!
Quick and Easy Caramel Apple Dip Variations:
Alright, I hear you. Sometimes you want that caramel apple goodness, but you don’t have time for all the stirring and temperature-watching. Don’t worry, I’ve got you covered! Here are some quick and easy variations that’ll satisfy your caramel cravings in no time.
5-Minute Microwave Caramel Apple Dip: This is my go-to when I’m short on time but big on cravings. It’s not quite the same as stovetop caramel, but it’s delicious in its own right.
You’ll need:
- 1/4 cup unsalted butter
- 1/2 cup brown sugar
- 2 tablespoons corn syrup
- 1/4 cup sweetened condensed milk
- In a microwave-safe bowl, melt the butter (about 30 seconds).
- Stir in the brown sugar and corn syrup.
- Microwave for 2 minutes, stirring every 30 seconds.
- Carefully stir in the condensed milk.
- Microwave for another 30-60 seconds until bubbly.
Let it cool a bit, and voila! Instant(ish) caramel apple dip.
No-Cook Cream Cheese Caramel Dip: This one’s for those days when you can’t even with the stove or microwave. It’s more of a “caramel-flavored” dip, but it’s creamy, delicious, and ready in a flash.
You’ll need:
- 8 oz cream cheese, softened
- 1/2 cup brown sugar
- 1/4 cup powdered sugar
- 1 teaspoon vanilla extract
Just mix everything together until smooth. That’s it! You can add a pinch of salt if you’re feeling fancy.
3-Ingredient Caramel Apple Dip for Busy Households: This one’s a lifesaver when the kids are screaming for a snack and you’re out of ideas.
You’ll need:
- 1 package (8 oz) cream cheese, softened
- 1/2 cup brown sugar
- 1/4 cup caramel sauce (store-bought is fine here)
Mix the cream cheese and brown sugar until smooth, then stir in the caramel sauce. Done and done!
I remember one time when I had promised my niece we’d make caramel apple dip, but then life got in the way (as it does). I whipped up the cream cheese version in about 3 minutes flat, and she was none the wiser. In fact, she loved it so much, she asked for the “special recipe” to take home!
These quick versions are great for last-minute gatherings, after-school snacks, or those times when you just need a sweet fix ASAP. They might not be traditional caramel, but they’ll definitely hit the spot. And hey, sometimes “good enough” is perfect!
Healthy Alternatives to Traditional Caramel Apple Dip:
Now, I know what you’re thinking. “Healthy caramel? Is that even possible?” Well, let me tell you, it is! And while these healthier versions might not be exactly like the real deal, they’re pretty darn delicious in their own right.
Low-Sugar Options: I’ll be honest, I was skeptical about low-sugar caramel at first. But after my doctor gently suggested I cut back on the sweet stuff, I had to get creative. Here’s a recipe that surprised even me:
- 1/2 cup coconut sugar (or monk fruit sweetener for even fewer calories)
- 1/4 cup coconut cream
- 2 tablespoons coconut oil
- 1/4 teaspoon salt
- 1/2 teaspoon vanilla extract
Cook it just like regular caramel, but be careful not to burn the coconut sugar – it can go from perfect to scorched in the blink of an eye. Trust me, I learned that the hard way!
Dairy-Free and Vegan Caramel Apple Dip: When my niece went vegan, I thought our caramel apple tradition was doomed. But we came up with this recipe that’s become a family favorite:
- 1 cup coconut milk (full fat, from a can)
- 1/2 cup coconut sugar
- 1/4 teaspoon salt
- 1 teaspoon vanilla extract
Simmer everything except the vanilla in a saucepan until it thickens, then stir in the vanilla at the end. It’s creamy, it’s sweet, and it’s 100% plant-based!
Fruit-Based “Caramel” Dips: Okay, I’ll admit it – these aren’t really caramel. But they’re sweet, they’re dippable, and they’re made entirely from fruit. Plus, they’re a hit with kids!
Date Caramel:
- 1 cup soft Medjool dates, pitted
- 1/4 cup warm water
- 1/4 teaspoon salt
- 1/2 teaspoon vanilla extract
Blend everything until smooth. Add more water if needed to get a dippable consistency.
Apple Butter “Caramel”: This one’s a bit of a cheat, but it’s delicious:
- 1 cup unsweetened apple butter
- 2 tablespoons maple syrup
- 1/4 teaspoon cinnamon
Mix it all together and enjoy! It’s not caramel, but it sure is tasty with apple slices.
I’ll never forget the time I served the date caramel at a family gathering without telling anyone it was healthy. My uncle, notorious for his sweet tooth, went back for seconds and thirds before I spilled the beans. The look on his face was priceless!
These healthier options might not be exactly like traditional caramel, but they’re delicious in their own right. And hey, if they let us enjoy the taste of caramel more often without the guilt, I’d call that a win!
Creative Flavor Twists on Caramel Apple Dip:
Alright, now that we’ve covered the basics and some healthier options, let’s have some fun! These creative twists on classic caramel apple dip will take your snack game to the next level.
Salted Caramel Apple Dip: This one’s for all you sweet-and-salty fans out there. I discovered salted caramel late in life, and let me tell you, it was a revelation!
Start with the classic caramel recipe, but add an extra 1/4 teaspoon of sea salt at the end. For an extra fancy touch, sprinkle some flaky sea salt on top just before serving. Trust me, your taste buds will thank you.
Spiced Caramel Apple Dip: Nothing says fall like warm spices. This version will make your house smell amazing!
Add these to your basic caramel recipe:
- 1/2 teaspoon ground cinnamon
- 1/4 teaspoon ground nutmeg
- A pinch of ground cloves
For a real autumn treat, try a pumpkin spice version by using 1 teaspoon of pumpkin pie spice instead. It’s like a PSL you can eat with a spoon!
Boozy Caramel Apple Dip: Now, this one’s strictly for the adults. I came up with this recipe for a girls’ night in, and it was a hit!
Add 2-3 tablespoons of your favorite liquor to the caramel after you take it off the heat. Some great options:
- Bourbon for a rich, smoky flavor
- Rum for a tropical twist
- Irish cream for extra decadence
Just remember, the alcohol doesn’t all cook off, so keep this one away from the kiddos!
I’ll never forget the time I made the bourbon version for a potluck. I labeled it clearly as “Adults Only,” but my friend’s husband thought I was joking. He ate half the bowl before his wife caught him! Needless to say, he had a very merry evening.
Chocolate Caramel Apple Dip: Because chocolate makes everything better, right?
After your caramel is done, stir in 1/4 cup of chocolate chips while it’s still hot. Dark, milk, or white chocolate – they’re all delicious! For a real treat, try swirling in some peanut butter too.
Maple Caramel Apple Dip: This one’s a nod to my Canadian friends. Replace half the sugar in your caramel recipe with pure maple syrup. The result is a dip that tastes like autumn in a bowl!
Remember, these are just starting points. Don’t be afraid to experiment with your own flavor combinations. Some of my best recipes have come from happy accidents in the kitchen. Like the time I accidentally spilled some orange zest into my caramel – turns out, orange caramel is delicious! Who knew?
Best Apples for Dipping and Serving Suggestions:
Now that we’ve got our dips sorted, let’s talk about the star of the show – the apples! Not all apples are created equal when it comes to caramel dipping. Here’s my rundown of the best apples for the job:
- Granny Smith: The classic choice. Their tartness balances out the sweet caramel perfectly.
- Honeycrisp: My personal favorite. They’re crisp, juicy, and have just the right amount of sweetness.
- Fuji: These are great if you prefer a sweeter apple. They hold up well to dipping too.
- Pink Lady: Another tart option that pairs beautifully with caramel.
- Braeburn: These have a nice balance of sweet and tart, with a firm texture that’s great for dipping.
Remember the time I tried using Red Delicious apples for dipping? Big mistake! They’re too soft and the skin is too waxy. Learn from my fails, folks!
Now, let’s talk presentation. Sure, you could just plop your dip in a bowl and call it a day. But where’s the fun in that? Here are some creative serving ideas that’ll wow your guests:
- Apple “Nachos”: Slice apples thinly and arrange them on a platter. Drizzle with warm caramel dip and sprinkle with chopped nuts, chocolate chips, or coconut flakes.
- Caramel Apple Dip Bar: Set out bowls of different dips (maybe try a few of those variations we talked about earlier) along with sliced apples and other dippers. Let your guests mix and match!
- Mini Caramel Apple Bites: Core small apples or cut larger ones into wedges. Stick them with popsicle sticks or fancy cocktail picks, and serve with individual portions of dip.
- Hollowed Apple Bowls: Cut apples in half, scoop out the center, and fill with caramel dip. It’s a cute, edible serving dish!
- Caramel Apple “Charcuterie” Board: Arrange sliced apples, caramel dip, cheese cubes, nuts, and maybe some pretzels or graham crackers on a big board. It’s a sweet and salty treat that’s perfect for gatherings.
And hey, who says you have to stick to just apples? Here are some other tasty dipping options:
- Pears: They pair (pear?) beautifully with caramel.
- Banana slices: Frozen banana slices dipped in warm caramel are heavenly.
- Pretzels: For when you need that sweet and salty fix.
- Marshmallows: Dip them in caramel, then roll in chopped nuts. You’re welcome.
- Potato chips: Don’t knock it ’til you’ve tried it!
I once served a caramel apple dip bar at a fall party, complete with different dips and all sorts of dipping options. It was such a hit that my friends still talk about it years later. In fact, it’s become a yearly tradition!
Storing and Reheating Homemade Caramel Apple Dip:
Alright, let’s talk storage. In the rare event that you have leftover caramel apple dip (does that even happen?), you’ll want to know how to keep it fresh and delicious for next time.
First things first: always let your caramel dip cool completely before storing it. I learned this the hard way when I once put warm caramel in a plastic container. Let’s just say melted plastic and caramel do not mix!
For short-term storage (up to a week), your best bet is an airtight container in the fridge. Glass jars work great for this. Just make sure to press some plastic wrap directly onto the surface of the caramel before putting the lid on. This prevents that annoying skin from forming on top.
Now, can you freeze caramel apple dip? The answer is… maybe. Cream-based caramels can separate when frozen and thawed. But if you’re determined to make your caramel last, here’s what you can do:
- Pour the cooled caramel into a freezer-safe container, leaving some room for expansion.
- Place a piece of plastic wrap directly on the surface of the caramel.
- Seal the container tightly and freeze for up to 3 months.
When you’re ready to use it, thaw it overnight in the fridge. If it separates, don’t panic! Just give it a good whisk once it’s at room temperature.
Reheating your caramel dip is where the magic happens. Cold caramel is tasty, but warm caramel? That’s the stuff dreams are made of! Here are a few methods:
- Microwave: This is the quickest method. Heat in 15-second bursts, stirring between each, until it reaches your desired consistency. Be careful not to overheat, or you’ll end up with a burnt, bubbling mess. Trust me, I’ve been there!
- Double boiler: This method gives you more control. Place your caramel in a heatproof bowl over a pot of simmering water. Stir occasionally until it’s warm and smooth.
- Slow cooker: Perfect for parties! Put your caramel in a small slow cooker on the “warm” setting. Give it a stir every now and then.
One time, I forgot about my caramel in the microwave and ended up with a volcanic eruption of sugary lava all over the place. It took forever to clean up, but at least my kitchen smelled amazing for days!
Remember, reheated caramel can be a bit thinner than freshly made. If it’s too thin for your liking, let it cool a bit – it’ll thicken as it cools. If it’s too thick, stir in a splash of cream or milk.
Troubleshooting Common Caramel Apple Dip Issues:
Even the most experienced caramel makers run into issues sometimes. Don’t worry – I’ve made pretty much every caramel mistake in the book, and I’m here to help you avoid them!
Grainy or Crystallized Caramel: This is probably the most common issue. You’re cooking along, everything looks great, and suddenly – bam! Your smooth caramel turns into a grainy mess.
The Fix: Prevention is key here. Avoid stirring the sugar while it’s melting, and brush down the sides of the pan with a wet pastry brush to prevent sugar crystals from forming. If it does crystallize, you can try to save it by adding a splash of water and reheating slowly, stirring until the crystals dissolve. But honestly? Sometimes it’s easier to just start over.
Caramel Too Thin: Your caramel is tasty, but it’s more of a sauce than a dip.
The Fix: Cook it a bit longer. If it’s already cooled, you can reheat it and continue cooking until it reaches your desired consistency. Remember, it’ll thicken as it cools.
Caramel Too Thick: On the flip side, sometimes your caramel ends up more like taffy than a dip.
The Fix: If it’s still warm, whisk in a bit more cream or milk. If it’s already cooled, reheat it gently and then add the extra liquid.
Burnt Caramel: Oops! You got distracted for a minute and now your caramel smells like a bonfire.
The Fix: Unfortunately, there’s no saving burnt caramel. Once it’s burnt, those bitter flavors are there to stay. Trust me, I’ve tried to salvage burnt caramel more times than I’d like to admit. It never ends well. Your best bet is to start over and keep a closer eye on it next time.
Separated Caramel: Sometimes your caramel can separate, leaving you with an oily mess.
The Fix: This usually happens when the temperature changes too quickly. If your caramel separates, try whisking it vigorously while it’s still warm. If that doesn’t work, you can try adding a splash of very hot water and whisking again.
Caramel Won’t Darken: You’ve been cooking forever, but your sugar just won’t caramelize.
The Fix: This can happen if there’s any fat or liquid in with your sugar from the start. Make sure your pan and utensils are completely clean and dry before you begin. Also, be patient – sometimes it takes a while for the color to change, but once it starts, it happens quickly!
I’ll never forget the time I was making caramel for a dinner party, and it just wouldn’t darken. I kept cooking and cooking, getting more and more frustrated. Turns out, I had accidentally grabbed the salt instead of the sugar! Needless to say, we had store-bought dessert that night.
Remember, making caramel is part science, part art, and part patience. Don’t get discouraged if it doesn’t turn out perfect every time. Even the pros have their off days. The important thing is to keep trying, keep learning, and keep enjoying the sweet results of your efforts!
Conclusion:
Whew! We’ve covered a lot of ground, haven’t we? From basic recipes to fancy variations, healthy alternatives to troubleshooting tips, we’ve explored the wonderful world of homemade caramel apple dip in all its sticky, sweet glory.
Making your own caramel apple dip might seem daunting at first, but trust me, it’s so worth it. There’s something magical about watching sugar transform into that golden, buttery goodness. And the smell? It’s better than any scented candle, I promise you that.
Remember, practice makes perfect. Don’t be discouraged if your first attempt isn’t picture-perfect. My first try at caramel was a crystallized disaster, but look at me now – writing a whole guide about it! Each time you make it, you’ll learn something new and get a little bit better.
I encourage you to experiment with different flavors and variations. Maybe you’ll discover a new favorite combination. Cardamom caramel? Why not! Lavender caramel? Go for it! The only limit is your imagination (and maybe your pantry).
And hey, even if your caramel doesn’t turn out exactly as planned, chances are it’ll still taste pretty darn good. Some of my favorite recipes have come from happy accidents in the kitchen.
So go forth and caramelize! Whip up a batch for your next party, surprise your kids with an after-school treat, or just make some for yourself – because let’s face it, sometimes we all need a little sweet indulgence.
I’d love to hear about your caramel apple dip adventures. What worked for you? What didn’t? Did you come up with any exciting new variations? Drop a comment below and let me know!
Remember, life is short. Eat the caramel, dip the apple, and enjoy every sticky, sweet moment. Happy dipping, everyone!
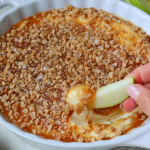
Caramel Apple Dip
Ingredients
- 1 8 ounce block cream cheese softened
- ⅓ cup sugar
- 1 16 ounce container caramel dip or thick caramel sauce
- ½ cup toffee bits
Instructions
- In a medium bowl, beat the cream cheese with a mixer until smooth and creamy.
- Add the sugar and continue beating until fully combined.
- Spread the cream cheese mixture evenly in a 3-cup serving dish.
- Pour the caramel dip or sauce over the top and spread it into an even layer. Sprinkle with toffee bits, then serve with sliced apples.