
You know what’s funny? I never thought I’d become known as the “mushroom cowboy” among my ranching friends, but after 20+ years of experimenting with trail cooking, here we are! Did you know that cowboys have been cooking mushrooms on the trail for over 150 years? It’s true – these humble fungi have been a staple of chuck wagon cooking since the early cattle drives.
I’ll never forget my first attempt at cooking morels over a campfire. Let’s just say the results were… well, charred beyond recognition! But those early mistakes taught me valuable lessons that I’m excited to share with you today. Whether you’re planning a weekend camping trip or gearing up for a month-long cattle drive, these tried-and-true techniques will help you create delicious, safe, and authentic trail-cooked mushroom dishes.
Trust me – there’s nothing quite like the earthy aroma of wild mushrooms sizzling over a campfire after a long day on horseback. So, saddle up partner – we’ve got some cooking to do!
Essential Trail Cooking Equipment for Mushrooms
Let me tell you about the time I tried cooking mushrooms with a cheap, thin-walled pan on the trail. What a disaster! The pan warped over the campfire heat, sending my beautiful morels flying into the dirt. That’s when I learned my first big lesson about trail cooking equipment – quality matters!
After years of trial and error (and more than a few ruined meals), I’ve narrowed down the absolute essentials for successful mushroom cooking on the trail. Here’s what you’ll need:
First up is cast iron – your best friend on the trail! I swear by my 12-inch skillet and 6-quart Dutch oven. These workhorses have seen me through countless cattle drives and never let me down. The key is in the seasoning – I learned that trick from an old ranch cook who’d been working chuck wagons for 40 years.
For cleaning and prep work, you’ll want:
- A good quality mushroom knife (trust me, it makes a difference!)
- A sturdy cutting board (I prefer hardwood – plastic can harbor bacteria)
- Steel wool for cleaning cast iron
- Heavy-duty tongs (at least 16 inches long to keep your hands safe)
- Heat-resistant gloves (learned this one the hard way!)
Fire management tools are crucial too. You’ll need:
- A shovel for managing coals
- A good set of fire irons
- A grill grate (optional but helpful)
- Long-handled spoons and spatulas
For your spice kit, I keep it simple but effective:
- Salt and pepper (obviously!)
- Garlic powder
- Dried thyme
- Red pepper flakes
- A small container of cooking oil
One thing that really changed my trail cooking game was investing in proper storage containers. Mason jars work great for dried mushrooms, and I always pack a few airtight containers for fresh ones.
Mushrooms Preparation Techniques on the Trail
I’ll never forget the time I watched an old-timer clean mushrooms using morning dew and a bandana! While that’s a bit extreme, it taught me something important – you’ve got to be resourceful on the trail.
First things first – cleaning your mushrooms without running water. Here’s what I’ve learned works best:
A clean, dry brush is your best friend for removing dirt and debris. I use a soft-bristled mushroom brush, but a clean pastry brush works too. Gently brush the mushrooms, working from the cap down to the stem. Never soak your mushrooms in water – they’re like little sponges and will get waterlogged!
For cutting techniques, I prefer to tear larger mushrooms by hand when possible. It might sound odd, but I’ve found that torn mushrooms actually hold their flavor better than cut ones. When I do need to cut them, I always use a sharp knife and slice with the grain of the mushroom.
Speaking of knives – keep them sharp! I learned this lesson the hard way when my dull knife slipped on a wet portobello. Hello, stitches! Now I always pack a small sharpening stone.
Let’s talk portions. One mistake I see folks make is cutting their mushrooms too small. Remember – mushrooms shrink a lot during cooking! I typically cut them slightly larger than I want them to end up. For reference, a good portion size is about:
- 4-6 medium button mushrooms per person
- 2-3 large portobellos
- A handful of smaller wild mushrooms
Fire Management for Mushrooms Cooking
Boy, do I have some stories about learning fire management the hard way! There was this one time in the Bighorn Mountains when I tried cooking morels over green pine wood. Let’s just say the mushrooms tasted like a Christmas tree air freshener!
The secret to perfect mushroom cooking over a campfire isn’t just about the flames – it’s all about those coals. Here’s what I’ve learned after countless meals under the stars:
Start with good, dry hardwood if possible. Oak, maple, or hickory are my go-to choices. They burn hot and steady, creating perfect cooking coals. If you’re in pine country like I often am, look for well-seasoned wood and let it burn down completely before cooking.
When building your fire for mushroom cooking, think zones:
- Hot zone: Direct heat for searing
- Medium zone: Perfect for most mushroom cooking
- Cool zone: Great for keeping things warm
Here’s my tried-and-true method for creating the perfect cooking fire:
- Build a basic teepee fire
- Let it burn down until you have a good bed of coals
- Rake the coals to create your cooking zones
- Keep small pieces of dry wood handy for maintaining temperature
Classic Cowboy Mushrooms Recipes
Let me share my absolute favorite trail recipes – ones that have never let me down, even when cooking for the pickiest ranch hands! I remember the first time I served mushroom gravy at a roundup. The old-timers were skeptical, but by the end of the meal, they were literally licking their plates clean!
Basic Sautéed Trail Mushrooms
Here’s my fool-proof method that works every time:
- Heat your cast iron until a drop of water dances across it
- Add a generous knob of butter (about 2 tablespoons)
- Toss in your mushrooms – but don’t crowd them! That’s crucial
- Season with salt and pepper
- Let them be! No constant stirring (I learned this the hard way)
- Cook until golden brown, about 5-7 minutes
Chuck Wagon Mushroom Gravy
This recipe has literally made grown cowboys cry tears of joy:
- Start with sautéed mushrooms as above
- Add 2 tablespoons of flour to the pan
- Cook the flour until it smells nutty
- Slowly add beef broth (I save it from the previous night’s dinner)
- Stir until thick and smooth
- Season with salt, pepper, and a pinch of thyme
Dutch Oven Stuffed Mushrooms
These are my go-to when I want to impress visitors to the ranch:
- Clean large button mushrooms and remove stems
- Chop stems finely and mix with breadcrumbs, garlic, and herbs
- Stuff the caps and top with a bit of cheese
- Place in Dutch oven with coals arranged for 350°F heat
- Cook 20-25 minutes until golden
Advanced Trail Cooking Methods
You wouldn’t believe how many mushrooms I ruined before mastering these techniques! One time, I tried smoking mushrooms using wet sage brush – let’s just say the local coyotes wouldn’t even come near our camp that night!
Dutch Oven Mastery
The key to Dutch oven cooking is coal placement. Here’s my tried-and-true formula:
- For 350°F: Use total coals equal to the oven diameter in inches, plus 2
- Place ⅓ of coals underneath and ⅔ on top
- Rotate the oven every 15 minutes (clockwise) and the lid (counterclockwise)
Smoke Cooking Mushrooms
This technique took me years to perfect! Start with:
- Dry hardwood chips (apple or hickory work great)
- Clean portobello or large button mushrooms
- A setup that allows indirect heat
- Patience – this takes about 45 minutes
Stone Cooking
Here’s a technique I learned from an old Navajo guide:
- Find flat, non-porous river rocks
- Heat them in your fire for 30 minutes
- Brush clean and arrange mushrooms on top
- Season and watch them cook to perfection
Preservation and Storage on the Trail
I’ll never forget the time I lost three days’ worth of morels because I stored them in a plastic bag. What a rookie mistake! After that expensive lesson, I developed these foolproof methods for keeping mushrooms fresh on the trail.
Drying Mushrooms
My favorite method for preserving mushrooms:
- Slice mushrooms thin (⅛ inch)
- String them on clean cord or twine
- Hang them near (not over) your evening fire
- Store in paper bags once completely dry
Short-term Storage
For fresh mushrooms:
- Never use plastic bags (trust me on this!)
- Paper bags work best
- Keep them cool and dry
- Check daily for any signs of spoilage
- Use within 2-3 days
Rehydration Techniques
Here’s what I’ve found works best:
- Hot water method (15-20 minutes)
- Cold water method (2-4 hours)
- Broth method (adds extra flavor)
- Save the soaking liquid for cooking!
Pairing Mushrooms with Other Trail Foods
You should’ve seen the looks on my crew’s faces when I first served mushroom and beef stew instead of plain old beans! Now they won’t let me cook anything else. Through years of trial and error, I’ve discovered some foolproof combinations that’ll make any trail meal memorable.
Beef and Mushroom Pairings
- Chuck roast with sautéed button mushrooms
- Ribeye topped with smoky portobellos
- Ground beef and mushroom chili
- Beef stew loaded with mixed mushrooms
Breakfast Combinations
My favorite way to start a morning on the trail:
- Scrambled eggs with wild mushrooms
- Mushroom and potato hash
- Biscuits with mushroom gravy
- Breakfast burritos with mushrooms
Troubleshooting Common Trail Cooking Issues
Let me tell you about the time I tried to cook mushrooms in a thunderstorm! That was a real learning experience. After 20 years of trail cooking, I’ve encountered just about every problem you can imagine. Here’s how to handle the most common issues:
Weather Challenges
- Wind: Create a windbreak using your tarp or saddle
- Rain: Always pack a good tarp for your cooking area
- Cold: Adjust coal placement for higher heat
- Heat: Cook early morning or late evening
Equipment Problems
Quick fixes I’ve learned:
- Warped pan: Use it for dry storage instead
- Cracked Dutch oven: Line with foil for temporary fix
- Lost utensils: Carved wooden spoons work in a pinch
- Dull knife: Use river rocks as temporary sharpening stones
Heat Management Issues
Common problems and solutions:
- Too hot: Raise cooking height or reduce coals
- Too cool: Add fresh coals around edges
- Uneven heating: Rotate more frequently
- Scorching: Always start with more distance than you think you need
Conclusion
After all these years of cooking mushrooms on the trail, I can honestly say that some of my best meals have been cooked over an open fire, miles from nowhere. Remember, every great trail cook started somewhere – probably making the same mistakes I did! Start with the basics, be patient with yourself, and don’t be afraid to experiment (just maybe not during a cattle drive!).
The key to success is preparation, patience, and practice. Each time you cook on the trail, you’ll learn something new. Some days you’ll create masterpieces, and others… well, let’s just say the coyotes will eat well! But that’s all part of the adventure.
I’d love to hear about your own trail cooking experiences! Drop a comment below sharing your favorite mushroom recipes or disasters – we’ve all had them! And remember, whether you’re a weekend warrior or a seasoned ranch hand, there’s always room for improvement in your trail cooking game.
Happy trails and good cooking, partners!
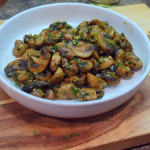
Sauteed Garlic Mushroom
Ingredients
- 1 pound brown mushrooms or white cremini, or portobello mushrooms
- 1 tablespoon soy sauce
- 2 tablespoons olive oil
- 2 tablespoons butter
- ¼ cup white wine optional
- 1 sprig fresh thyme or a pinch of dried thyme
- 2 cloves garlic minced
- chopped fresh chives for garnish optional
Instructions
- Gently clean the mushrooms by wiping them with a paper towel or using a mushroom brush. Slice them into thick pieces, about ½ inch wide.In a pan, heat butter and oil over medium-high heat.Right before cooking, quickly toss the mushrooms with soy sauce (do not do this in advance to prevent them from releasing too much moisture).Add the mushrooms to the pan and toss them in the butter and oil mixture. Let them cook undisturbed for 4-5 minutes to brown on one side.If using, add white wine and let it evaporate. Add garlic and thyme (if desired) and continue cooking for another 3-4 minutes, stirring occasionally, until the mushrooms are fully cooked.Season with salt and pepper to taste before serving.