 Skip to content
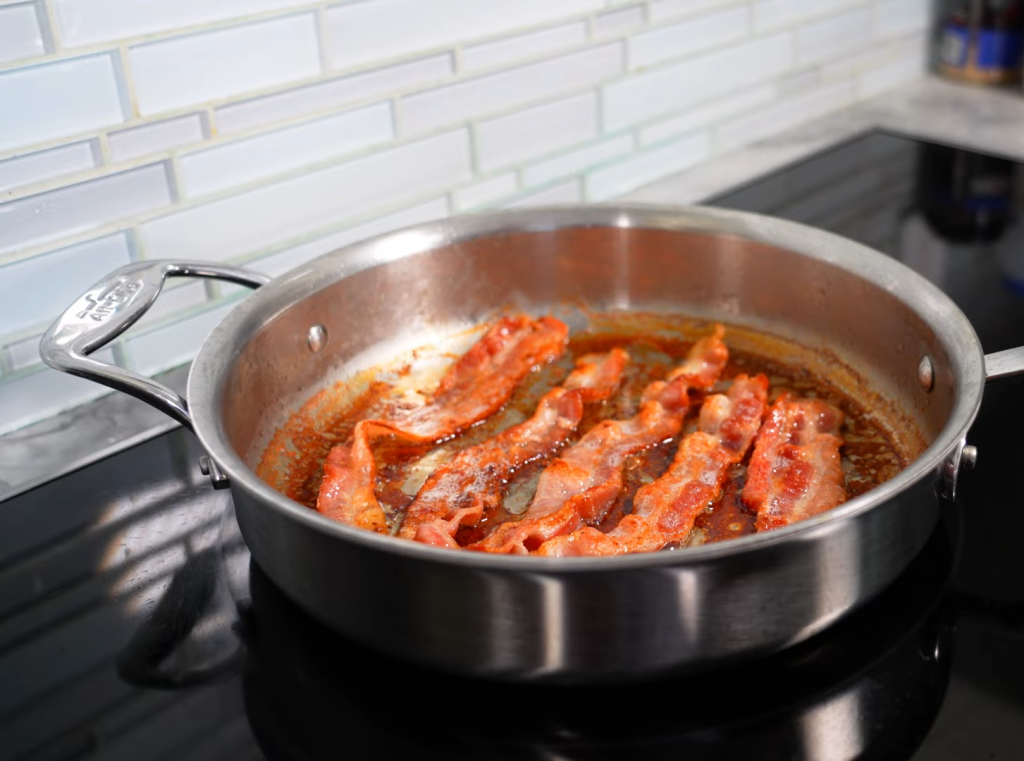
Did you know that the average American consumes about 18 pounds of bacon per year? Holy smokes, that’s a lot of sizzle! As a self-proclaimed bacon enthusiast (and occasional over-indulger), I’ve spent years perfecting the art of cooking this crispy, salty delicacy. Whether you’re a bacon newbie or a seasoned pro, this guide will help you elevate your bacon game to new heights. So, grab your favorite skillet, and let’s dive into the world of bacon!
Understanding Bacon: Types and Flavors
Alright, folks, let’s start with Bacon 101. Trust me, there’s more to bacon than just picking up a pack at the grocery store and tossing it in a pan (though I’ve definitely been guilty of that on busy mornings!).
First up, we’ve got different cuts of bacon:
- Streaky bacon: This is what most of us think of when we hear “bacon.” It comes from pork belly and has those beautiful strips of fat that make it oh-so-crispy.
- Back bacon: Also known as Canadian bacon, this leaner cut comes from the loin. It’s meatier and less fatty than streaky bacon.
- Jowl bacon: Made from pork cheeks, this type is super flavorful but a bit harder to find. I stumbled upon it at a local butcher shop and let me tell you, it was a game-changer for my carbonara!
Now, let’s talk curing methods. There are two main ways to cure bacon:
- Wet curing: The pork is soaked in a salty brine solution. This method is quicker and more commonly used for commercial bacon.
- Dry curing: The meat is rubbed with salt and seasonings and left to cure. This takes longer but often results in a more intense flavor.
I once tried my hand at dry-curing bacon at home. Let’s just say it was a… learning experience. My kitchen smelled amazing for weeks, though!
When it comes to smoking, the type of wood used can really impact the flavor. Here are some popular choices:
- Hickory: Gives a strong, hearty flavor. It’s a classic for a reason!
- Applewood: Offers a milder, slightly sweet taste. Great for breakfast bacon.
- Maple: Imparts a subtle sweetness. Perfect if you like your bacon with a hint of maple syrup flavor.
Lastly, don’t forget about specialty bacons. From peppered to maple-glazed, there’s a world of flavored bacons out there to explore. I once had chocolate-covered bacon at a food festival – it was weirdly delicious!
Essential Equipment for Cooking Bacon
Now that we’ve covered the types of bacon, let’s talk tools. You don’t need a kitchen full of gadgets to cook great bacon, but having the right equipment can make a big difference.
- Pans:
- Cast iron skillet: My personal favorite. It distributes heat evenly and gives bacon a perfect crisp. Plus, it gets better with age, just like a fine wine (or me, I’d like to think!).
- Non-stick pan: Great for easy cleanup, especially when you’re cooking for a crowd and don’t want to spend hours scrubbing pans.
- Griddle: Ideal for cooking large batches. I use this when I’m making breakfast for the whole family.
- Oven tools:
- Baking sheets: For oven-baking bacon. Look for ones with a rim to catch the grease.
- Wire racks: Place these on your baking sheets for extra-crispy bacon. The grease drips away, leaving you with perfectly crisp strips.
- Microwave bacon cookers: I was skeptical about these at first, but they’re surprisingly effective for quick bacon fixes. Just don’t tell my grandmother I sometimes use the microwave for bacon – she’d disown me!
- Grilling equipment: Tongs are a must-have for flipping bacon on the grill. Also, consider a grill basket to prevent your precious bacon from falling through the grates.
- Bacon presses: These heavy weights help keep bacon flat while cooking. They’re not essential, but they’re great if you like your bacon extra crispy and straight as an arrow.
Remember, you don’t need all of these to make great bacon. Start with what you have and expand your bacon toolkit as you go. I started with just a basic skillet and now… well, let’s just say my kitchen cupboards are a testament to my bacon obsession!
Mastering Basic Bacon Cooking Methods
Alright, bacon lovers, it’s time to get cookin’! Let’s break down the most common methods for preparing our favorite crispy treat.
- Stovetop Frying: This is probably the method most of us learned from our parents or grandparents. It’s quick, easy, and gives you a lot of control over the doneness of your bacon.
- Start with a cold pan. I know it’s tempting to crank up the heat, but trust me on this one.
- Arrange your bacon strips in a single layer.
- Cook over medium-low heat, flipping occasionally.
- Once it’s done to your liking, transfer to a paper towel-lined plate to drain.
- Oven Baking: This is my go-to method when I’m cooking for a crowd or just don’t want to stand over a stove.
- Preheat your oven to 400°F (200°C).
- Line a baking sheet with parchment paper or foil.
- Lay out the bacon strips, making sure they don’t overlap.
- Bake for 15-20 minutes, or until they reach your desired crispiness.
- Microwave Cooking: Okay, I know what you’re thinking. “Microwave? Seriously?” But hear me out! This method is great when you need bacon in a hurry.
- Place a microwave-safe plate with a few layers of paper towels.
- Arrange bacon in a single layer.
- Cover with another paper towel.
- Cook on high for about 1 minute per slice.
- Grilling: Perfect for summer cookouts or when you want that smoky flavor.
- Preheat your grill to medium-high.
- Place bacon directly on the grates or use a grill basket.
- Cook for 5-7 minutes, flipping once.
- Air Frying: If you’ve jumped on the air fryer bandwagon (like I finally did last year), you’ll love this method.
- Preheat your air fryer to 350°F (175°C).
- Lay bacon in a single layer in the basket.
- Cook for 8-10 minutes, shaking the basket halfway through.
Remember, cooking times can vary depending on the thickness of your bacon and your personal preference. Don’t be afraid to experiment and find what works best for you. I once burned a whole batch trying to multitask (pro tip: don’t try to fold laundry while cooking bacon). But hey, that’s how we learn, right?
Advanced Bacon Cooking Techniques
Ready to take your bacon game to the next level? Let’s dive into some advanced techniques that’ll make your taste buds dance and your friends think you’ve gone to culinary school!
- Bacon Weaving: This technique is perfect for BLTs, bacon-wrapped anything, or just showing off.
- Create a lattice of bacon strips, weaving them over and under each other.
- Cook in the oven at 400°F (200°C) for about 20-25 minutes.
- Candied Bacon: Sweet, salty, and utterly addictive. Here’s a simple recipe:
- Preheat oven to 375°F (190°C).
- Mix brown sugar with a bit of cayenne pepper.
- Coat bacon slices in the mixture.
- Bake on a parchment-lined sheet for 15-20 minutes.
- Bacon Cups and Bowls: Edible bacon containers? Yes, please!
- Flip a muffin tin upside down.
- Weave bacon strips over the cups.
- Bake at 375°F (190°C) for about 20-25 minutes.
- Rendering Bacon Fat: Don’t you dare throw away that liquid gold!
- Cook bacon as usual.
- Strain the leftover fat through a fine-mesh sieve.
- Store in a glass jar in the refrigerator.
- Curing and Smoking Homemade Bacon: This is not for the faint of heart, but it’s incredibly rewarding.
- Cure pork belly with salt, sugar, and spices for 5-7 days.
- Rinse and dry the meat.
- Smoke at 200°F (95°C) until it reaches an internal temperature of 150°F (65°C).
Remember, these advanced techniques might take some practice. Don’t get discouraged if your first bacon weave looks more like abstract art than a lattice. Keep at it, and soon you’ll be amazing your friends and family with your bacon mastery!
Tips for Perfectly Crispy Bacon Every Time
Ah, the holy grail of bacon cooking – achieving that perfect crispiness. After years of trial and error (and many, many delicious mistakes), I’ve gathered some foolproof tips for consistently crispy bacon.
- Choose the Right Thickness:
- Thin-cut bacon will get crispier faster, but it’s also easier to burn.
- Thick-cut bacon takes longer to crisp up but gives you more wiggle room in cooking time.
- Start with a Cold Pan: I know it seems counterintuitive, but trust me on this one. Starting with a cold pan allows the fat to render slowly, resulting in crispier, more evenly cooked bacon.
- Proper Bacon Spacing: Don’t overcrowd the pan! Give those strips some breathing room. Overcrowding leads to steaming instead of crisping. Nobody wants steamed bacon, trust me.
- Managing Grease Splatter: Bacon and grease splatter go hand in hand, but there are ways to minimize the mess:
- Use a splatter screen.
- For oven cooking, line your baking sheet with parchment paper or foil.
- In a pinch, I’ve used the lid of a large pot as a makeshift splatter guard. It works surprisingly well!
- Achieving the Perfect Doneness: Remember, bacon will continue to crisp up a bit after you remove it from the heat. So, take it out when it’s just shy of your desired crispiness. Pro tip: If you’re cooking a big batch for a crowd, you can keep bacon warm and crispy in a 200°F (95°C) oven for up to an hour. Just be prepared for your house to smell amazing and for unexpected guests to suddenly show up!
- The Paper Towel Trick: After cooking, drain your bacon on paper towels to remove excess grease. But don’t let it sit there too long, or it might start to steam and lose its crispiness.
- Consider Your Cooking Surface: Different surfaces can affect crispiness:
- Cast iron retains heat well and gives a nice, even crisp.
- Non-stick pans are great for easy release but might not crisp as well.
- For oven cooking, using a wire rack allows hot air to circulate around the bacon, resulting in extra crispiness.
- Experiment with Your Oven: If you’re an oven bacon convert like me, try this: start with a cold oven, place your bacon in, then set it to 425°F (220°C). The gradual heat increase helps render the fat beautifully.
Remember, achieving the perfect crispy bacon is part science, part art, and a whole lot of delicious practice. Don’t be afraid to experiment and find what works best for you and your taste buds. And if you burn a batch or two along the way? Well, that’s just part of the journey. Besides, slightly overcooked bacon still tastes pretty darn good in my book!
Creative Ways to Incorporate Bacon in Recipes
Alright, fellow bacon enthusiasts, it’s time to get creative! Bacon isn’t just for breakfast anymore (though let’s be honest, bacon for breakfast is pretty amazing). Let’s explore some innovative ways to use this magical meat in all sorts of dishes.
- Bacon as a Flavor Enhancer in Savory Dishes:
- Crumble bacon into your mac and cheese for a smoky twist.
- Add bacon bits to your salad dressings for extra oomph.
- Wrap asparagus or green beans in bacon before roasting.
- Sweet and Salty Bacon Desserts: Yes, you read that right. Bacon in desserts is a game-changer!
- Make bacon chocolate chip cookies. Trust me, it works.
- Top your ice cream with candied bacon bits.
- Create a bacon-infused maple syrup for pancakes or waffles.
- Bacon-Wrapped Delights: If it’s edible, you can probably wrap it in bacon. Some favorites:
- Bacon-wrapped dates stuffed with goat cheese.
- Bacon-wrapped scallops or shrimp.
- Bacon-wrapped meatloaf (because why not double down on the meat?).
- Using Bacon Fat as a Cooking Medium: Remember that liquid gold we saved earlier? Put it to good use!
- Use it to pop popcorn for a smoky treat.
- Sauté vegetables in bacon fat for extra flavor.
- Make a warm bacon vinaigrette for salads.
- Vegetable Dishes Featuring Bacon: Making veggies more appealing, one bacon strip at a time.
- Bacon-wrapped asparagus bundles.
- Brussels sprouts sautéed with bacon and garlic.
- Bacon and corn chowder.
- Bacon in Unexpected Places: Let’s get weird (in a good way):
- Bacon jam: Spread it on sandwiches or use it as a glaze for meats.
- Bacon-infused vodka for the ultimate Bloody Mary.
- Bacon salt: Sprinkle it on anything and everything.
Remember, cooking with bacon is all about experimenting and having fun. Don’t be afraid to try new combinations. Some might not work out (but hey, that’s part of the adventure), and others might become your new favorite dishes.
The key is to think of bacon as a versatile ingredient, not just a side dish. Its salty, smoky flavor can enhance both savory and sweet recipes in surprising ways. So go ahead, get creative, and let bacon be the star (or the supporting actor) in your culinary creations!
Healthier Approaches to Cooking with Bacon
Now, I know what you’re thinking. “Healthy bacon? Is that even possible?” Well, while bacon isn’t exactly a superfood, there are ways to enjoy it as part of a balanced diet. Let’s explore some healthier approaches to our favorite crispy treat.
- Choosing Leaner Cuts:
- Opt for center-cut bacon, which has less fat than regular cuts.
- Canadian bacon (back bacon) is a leaner option with a different but delicious flavor profile.
- Turkey bacon can be a good alternative, though it doesn’t quite replicate the real thing (trust me, I’ve tried to fool my taste buds, and they’re not easily tricked!).
- Draining and Patting Excess Grease: This simple step can significantly reduce the fat content of your bacon.
- After cooking, drain bacon on paper towels.
- Gently pat the top of the bacon with another paper towel to remove more grease.
- For oven-baked bacon, use a wire rack over your baking sheet so the grease drips away.
- Portion Control Tips: I know, I know. Easier said than done, right? But hear me out:
- Use bacon as a flavoring rather than the main protein in a dish.
- Crumble a small amount of bacon over salads or soups for a flavor boost without going overboard.
- Remember, a little bacon can go a long way in terms of flavor!
- Turkey and Plant-Based Bacon Alternatives:
- Turkey bacon is lower in fat and calories than pork bacon.
- Tempeh or coconut bacon can be tasty vegan alternatives.
- There are even mushroom-based “bacon” products hitting the market now!
- Balancing Bacon in a Healthy Diet:
- Pair bacon with nutrient-dense foods like vegetables or whole grains.
- If you’re having bacon for breakfast, balance it out with some fruit or a vegetable omelet.
- Consider bacon a “sometimes” food rather than an everyday indulgence.
- Cooking Methods Matter:
- Oven-baking or grilling bacon can help reduce its fat content compared to pan-frying.
- If using a skillet, try using a non-stick pan to reduce the need for additional fats.
- Making Smart Swaps:
- Use bacon-flavored seasonings (like smoked paprika) to get that smoky flavor without the added fat.
- Try liquid smoke in recipes to mimic bacon’s smoky flavor.
Remember, enjoying bacon in moderation as part of a balanced diet is key. It’s all about finding that sweet spot between indulgence and mindful eating. And hey, if you’re like me and occasionally go overboard (bacon festival, anyone?), just balance it out with extra veggies and a brisk walk the next day. Life’s too short not to enjoy the foods we love!
Storing and Preserving Bacon
Alright, let’s talk bacon storage. Because let’s face it, as much as we’d like to eat all the bacon in one sitting (no judgment here!), sometimes we need to save some for later. Here’s how to keep your bacon fresh and delicious.
- Proper Refrigeration Techniques:
- Store unopened bacon in its original packaging in the refrigerator.
- Once opened, wrap tightly in plastic wrap or aluminum foil.
- For best quality, use refrigerated bacon within a week of opening.
- Freezing Methods for Long-Term Storage: Bacon freezes beautifully, which is great news for us bacon lovers!
- For whole packages: freeze in the original packaging for up to 6 months.
- For individual portions: separate slices with parchment paper, then wrap tightly in plastic wrap and place in a freezer bag.
- Label with the date so you know how long it’s been in there.
- Making and Storing Bacon Bits: Homemade bacon bits are so much better than the store-bought kind!
- Cook bacon until very crispy, then crumble.
- Store in an airtight container in the refrigerator for up to a week.
- For longer storage, freeze bacon bits for up to 6 months.
- Preserving Homemade Bacon: If you’ve ventured into making your own bacon (kudos to you!), here’s how to store it:
- After curing and smoking, wrap tightly in plastic wrap or vacuum seal.
- Refrigerate for up to 2 weeks or freeze for up to 3 months.
- Using Up Leftover Cooked Bacon: Let’s be real, “leftover bacon” is rarely a problem in my house, but just in case:
- Crumble and store in the refrigerator for up to 5 days.
- Use in salads, omelets, or as a topping for baked potatoes or soups.
- Freeze cooked and crumbled bacon for up to 3 months.
- Signs of Spoilage: Nobody wants bad bacon. Here’s what to look out for:
- Change in color (greyish or brown tinge)
- Slimy texture
- Off or sour smell
- The Bacon Grease Dilemma: Don’t forget about that liquid gold!
- Strain cooled bacon grease through a fine-mesh sieve or cheesecloth.
- Store in a glass jar in the refrigerator for up to 3 months.
- For longer storage, freeze bacon grease in ice cube trays, then transfer to a freezer bag.
Remember, proper storage not only keeps your bacon safe to eat but also preserves its flavor and texture. There’s nothing worse than looking forward to a bacon treat only to find it’s gone bad. Trust me, I’ve been there, and it’s a bacon lover’s nightmare!
Conclusion
Well, fellow bacon enthusiasts, we’ve come to the end of our sizzling journey through the world of bacon. From understanding different types of bacon to mastering cooking techniques, from getting creative with recipes to storing it properly, we’ve covered it all.
Remember, cooking with bacon is as much an art as it is a science. Don’t be afraid to experiment, try new things, and find what works best for you. Maybe you’ll discover you’re a fan of thick-cut bacon cooked in the oven, or perhaps you’ll become known for your legendary bacon-wrapped appetizers at parties.
As with any indulgence, moderation is key. Bacon can be part of a balanced diet when enjoyed responsibly. And hey, if you overindulge occasionally (guilty as charged!), that’s okay too. Life’s too short not to enjoy the foods we love.
I hope this guide has inspired you to elevate your bacon game and try some new techniques or recipes. Whether you’re cooking up a storm for a weekend brunch, adding a crispy touch to your salad, or embarking on the adventure of curing your own bacon, remember to have fun with it.
So, what are you waiting for? Get out there and start sizzling! And hey, if you’ve got any amazing bacon tips or recipes of your own, don’t keep them to yourself. Share them with your fellow bacon lovers – we’re all in this delicious journey together!
Now, if you’ll excuse me, all this talk about bacon has made me hungry. I think it’s time for a BLT… or maybe some bacon-wrapped dates… or perhaps that bacon jam I’ve been meaning to try. Decisions, decisions!
Happy cooking, and may your bacon always be crispy!
Recipe example:

Maple Bacon Waffle Burger Recipe
Ingredients
Prepare the Waffles:
- 8 slices bacon
- 1 tablespoon maple syrup
- 1 tablespoon brown sugar
- ½ teaspoon black pepper
The waffles:
- 2 cups all-purpose flour
- 1 tablespoon baking powder
- ½ teaspoon salt
- 2 tablespoons sugar
- ½ cup vegetable oil
- 1 ¾ cups milk
- 2 eggs
Peppered Maple Butter:
- 4 tablespoons salted butter room temperature
- 2 tablespoons maple syrup
- ½ teaspoon black pepper
Eggs & cheese:
- Eggs
- 4 slices cheddar cheese
