
Hey there, fellow chocolate enthusiasts! Have you ever bitten into a perfectly crafted turtle chocolate and thought, “Man, I wish I could make these at home”? Well, buckle up, because you’re about to embark on a delicious journey into the world of homemade turtle chocolates!
Did you know that turtle chocolates have been around since 1918? That’s right, these little nuggets of joy have been satisfying sweet tooths for over a century! And let me tell you, there’s something magical about creating these treats in your own kitchen. The smell of toasted nuts, the glossy sheen of tempered chocolate, and the gooey goodness of caramel – it’s a sensory experience like no other.
In this guide, I’m going to spill all my secrets (gained through many, many tasty experiments) on how to make the perfect homemade turtle chocolate. We’ll cover everything from choosing the right ingredients to troubleshooting common issues. By the end of this, you’ll be whipping up batches of turtle chocolates that’ll make your local chocolatier jealous!
So, grab your apron, and let’s dive into the sweet world of homemade turtle chocolates!
Understanding the Basics of Turtle Chocolate
Alright, before we jump into the nitty-gritty, let’s break down what makes a turtle chocolate, well, a turtle chocolate.
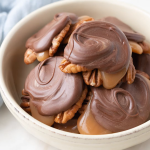
Picture this: a base of crunchy nuts (usually pecans) topped with a dollop of gooey caramel, all enrobed in rich, smooth chocolate. That, my friends, is the holy trinity of turtle chocolate. It’s called a “turtle” because, when viewed from above, the nut-caramel-chocolate combo kinda looks like a turtle with its head and legs peeking out from its shell. Cute, right?
Now, here’s where the magic happens. The combination of these three elements creates a taste and texture explosion in your mouth. You’ve got the crunch from the nuts, the chew from the caramel, and the melt-in-your-mouth smoothness of the chocolate. It’s like a party for your taste buds!
But here’s the thing – making the perfect turtle chocolate is all about balance. Too much caramel, and you’ll end up with a sticky mess. Too little chocolate, and you’ll lose that satisfying snap when you bite into it. It’s a delicate dance, but don’t worry – I’ve tripped over my own feet plenty of times to figure out the right moves!
The science behind this delectable treat is pretty cool too. The fats in the chocolate help to stabilize the caramel, preventing it from becoming too runny. Meanwhile, the proteins in the nuts contribute to the Maillard reaction when toasted, creating those complex, nutty flavors we all love.
So, now that we’ve got the basics down, are you ready to dive into the good stuff? Let’s talk ingredients!
Essential Ingredients for Homemade Turtle Chocolate
Okay, chocolate lovers, let’s talk about the star players in our turtle chocolate show. Getting the right ingredients is like casting for a blockbuster movie – each one has a crucial role to play!
First up, the chocolate. Oh boy, where do I start? When I first began making turtle chocolates, I just grabbed whatever was on sale at the supermarket. Big mistake! The quality of your chocolate can make or break your turtles. I learned this the hard way when my first batch tasted like, well, let’s just say it wasn’t great.
You’ve got three main options: dark, milk, or white chocolate. Dark chocolate gives you that rich, slightly bitter taste that contrasts beautifully with the sweet caramel. Milk chocolate is smoother and sweeter, perfect if you’re going for that classic candy bar flavor. And white chocolate? It’s the rebel of the bunch, offering a creamy, vanilla-y twist on the traditional turtle.
Pro tip: Look for chocolate with a high percentage of cocoa butter. It’ll melt more smoothly and give your turtles that beautiful glossy finish. Trust me, your taste buds (and your Instagram followers) will thank you!
Now, let’s talk nuts. Pecans are the traditional choice, and for good reason. Their buttery flavor and satisfying crunch are hard to beat. But don’t be afraid to experiment! I once used almonds when I ran out of pecans, and it was a game-changer. Walnuts can add a lovely earthiness, while macadamia nuts bring a tropical twist.
Whatever nut you choose, make sure to toast them first. I cannot stress this enough! Toasting brings out the oils in the nuts, intensifying their flavor and adding an extra layer of deliciousness to your turtles. Just be careful not to burn them – I may or may not have set off the smoke alarm a few times in my quest for perfectly toasted nuts.
Now, onto the caramel. Oh, caramel, how I love thee! You’ve got two options here: homemade or store-bought. If you’re feeling adventurous (and have a good candy thermometer), making your own caramel can be super rewarding. There’s something magical about watching sugar transform into that golden, gooey goodness.
But let’s be real – sometimes life gets busy, and there’s no shame in using a good quality store-bought caramel. Just make sure it’s soft enough to bite into easily, but firm enough to hold its shape when warm.
Want to jazz things up? Try adding a pinch of sea salt to your caramel for that sweet-salty combo that’s all the rage. Or how about a splash of bourbon for a grown-up twist? The possibilities are endless!
Remember, the key to great turtle chocolates is using ingredients you love. So don’t be afraid to splurge a little on that fancy chocolate or those premium nuts. Your taste buds will thank you!
Tools and Equipment You’ll Need
Alright, fellow turtle chocolate enthusiasts let’s talk tools of the trade! Now, I know what you’re thinking – “Do I really need a bunch of fancy equipment to make these treats?” Well, let me tell you a story about my first attempt at making turtle chocolates with just a bowl and a spoon. Let’s just say it ended with me covered in chocolate, the kitchen looking like a caramel warzone, and my dog giving me a look that said, “You’ve lost it, human.”
So, trust me when I say that having the right tools can make your turtle-making experience a whole lot smoother (and less messy)!
First up, you’re gonna need a good double boiler for melting your chocolate. “But wait,” I hear you say, “I don’t have a double boiler!” No worries! You can easily MacGyver one by placing a heat-safe bowl over a pot of simmering water. Just make sure the bottom of the bowl doesn’t touch the water, or you’ll end up with scorched chocolate. And let me tell you, scorched chocolate is not a mistake you want to make twice!
Next on the list: a candy thermometer. Now, I know it might seem like overkill but hear me out. If you’re making your own caramel (which I highly recommend trying at least once), a candy thermometer is your best friend. It’s the difference between silky-smooth caramel and a rock-hard sugar disc that could double as a hockey puck. Trust me, I’ve made both!
A silicone spatula is another must-have. It’s heat-resistant, flexible, and perfect for scraping every last bit of delicious chocolate or caramel from your bowl. I once tried using a regular spoon and ended up wasting so much chocolate that I almost cried. Learn from my mistakes, people!
Now, if you want to get fancy (and who doesn’t?), a chocolate tempering machine can be a game-changer. It keeps your chocolate at the perfect temperature for that professional-looking glossy finish. But don’t worry if you don’t have one – we’ll cover some manual tempering techniques later that’ll work just fine.
For shaping your turtles, you can use a baking sheet lined with parchment paper or a silicone mat. But if you want to get really creative, try using chocolate molds! They come in all sorts of fun shapes and sizes. I once made heart-shaped turtles for Valentine’s Day, and let me tell you, they were a hit!
Lastly, don’t forget about storage containers. Airtight containers are crucial for keeping your turtles fresh. I learned this the hard way when I left a batch out overnight and woke up to find them softer than a marshmallow in a sauna. Not ideal!
Remember, you don’t need to break the bank buying all this equipment at once. Start with the basics and build your collection over time. Before you know it, you’ll have a turtle chocolate-making setup that would make Willy Wonka jealous!
Step-by-Step Guide to Making Classic Turtle Chocolate
Alright, turtle aficionados, it’s time for the main event! Let’s roll up our sleeves and dive into making these delectable treats. Don’t worry if you’re a first-timer – we’re in this together, and I’ll guide you through every sticky, chocolatey step!
First things first, let’s prep our workspace. Trust me, having everything ready to go will save you from running around like a headless chicken (been there, done that!). Lay out your parchment paper or silicone mat on a baking sheet. Get your nuts toasted and chopped, your caramel ready to go, and your chocolate chopped up for melting.
Now, let’s tackle the trickiest part – tempering the chocolate. This is what gives your turtles that beautiful shine and satisfying snap. I remember my first attempt at tempering… let’s just say it was more “blob” than “snap.” But don’t worry, I’ve got you covered!
Here’s a simple method: Melt about 2/3 of your chocolate in your double boiler, stirring gently until it reaches 115°F (46°C) for dark chocolate or 110°F (43°C) for milk or white chocolate. Remove from heat and add the remaining 1/3 of chocolate, stirring until it melts and cools to about 88-90°F (31-32°C) for dark chocolate or 86-88°F (30-31°C) for milk or white. Voila! Tempered chocolate!
While your chocolate is tempering, let’s get those nuts ready. Arrange them in small clusters on your prepared baking sheet. I like to use about 3-4 pecans per turtle, but hey, the more the merrier, right?
Now for the fun part – the caramel! If you’re using homemade caramel, make sure it’s cooled slightly but still pourable. Carefully spoon a dollop onto each nut cluster. If you’re using store-bought caramel, you might need to warm it slightly. Just be careful not to make it too hot, or it’ll melt your chocolate. (Learned that one the hard way!)
Once your caramel has set a bit (pop the tray in the fridge for a few minutes if you’re impatient like me), it’s time for the chocolate bath! Using a spoon or a piping bag, drizzle your tempered chocolate over each turtle, making sure to cover the caramel completely. Don’t worry if it’s not perfect – remember, homemade charm is part of the appeal!
Now comes the hardest part – waiting. Let your turtles cool completely at room temperature. I know it’s tempting to speed things up in the fridge, but resist! Sudden temperature changes can cause the chocolate to bloom, leaving a whitish film on the surface. It’s still edible, but not as pretty.
And there you have it – your very own homemade turtle chocolates! Take a moment to bask in the glory of your creation. Snap a pic for the ‘gram (because if you didn’t post it, did it even happen?), and then reward yourself with a taste test. You’ve earned it!
Advanced Techniques for Perfect Turtle Chocolate
Okay, turtle maestros, ready to level up your game? Let’s dive into some advanced techniques that’ll take your turtle chocolates from “Mmm, that’s nice” to “Holy moly, where have these been all my life?!”
First up, let’s talk about mastering the art of chocolate tempering. Remember that simple method we used earlier? Well, that’s just the tip of the iceberg! For truly professional results, you might want to try the seeding method. This involves melting all your chocolate, then adding small pieces of unmelted chocolate to bring down the temperature and encourage proper crystal formation. It’s a bit trickier, but the results? chef’s kiss
I’ll never forget the first time I nailed the seeding method. I felt like a chocolate wizard! The shine on those turtles was so perfect, I could practically see my reflection. Of course, it took a few tries to get there. My first attempt looked more like a chocolate Jackson Pollock painting than turtle candies!
Now, let’s talk caramel. Creating silky-smooth caramel is an art form in itself. The key? Patience, my friends. Rush the process, and you’ll end up with a grainy mess. Trust me, I’ve been there, and it’s not pretty. Heat your sugar slowly and evenly and resist the urge to stir until it starts to melt. Once it’s amber-colored, add your cream and butter (carefully – that stuff is hot!), and stir until smooth.
Pro tip: Add a pinch of salt to your caramel. It enhances the flavor and cuts through the sweetness. I discovered this by accident when I knocked over the saltshaker while making caramel. Best kitchen disaster ever!
Achieving the ideal nut-to-chocolate ratio is crucial for that perfect turtle experience. I like to use a 1:1:1 ratio of nuts, caramel, and chocolate. But hey, if you’re a nut fanatic or a chocoholic, feel free to adjust! It’s your turtle party, after all.
Want to get fancy with your turtle presentation? Try using a fork to create decorative swirls on top of your turtles while the chocolate is still wet. Or sprinkle some sea salt on top for a gourmet touch. I once tried to pipe little turtle faces on mine… let’s just say I won’t be quitting my day job to become a chocolate artist anytime soon!
Another advanced technique is layering. Instead of just covering your caramel and nuts with chocolate, try creating a chocolate base first. Let it set, then add your nuts and caramel, and finish with another layer of chocolate. It’s a bit more work, but the result is a turtle that’s easier to eat and looks super professional.
Remember, these advanced techniques take practice. Don’t get discouraged if your first attempts aren’t perfect. Even the most skilled chocolatiers have their off days. The important thing is to keep experimenting, have fun, and of course, enjoy eating your “mistakes”!
Troubleshooting Common Issues
Alright, turtle troopers, let’s talk troubleshooting. Because let’s face it, even the most seasoned chocolate makers sometimes end up with a batch that’s more “oops” than “ooh-la-la”. But don’t worry – I’ve made pretty much every mistake in the book, so I’m here to help you avoid (or fix) them!
First up, the dreaded seized chocolate. You know the scene – one minute you’re happily melting chocolate, the next you’ve got a grainy, clumpy mess. What gives? Usually, it’s moisture. Even a tiny drop of water can make your chocolate seize faster than you can say “turtle”. I once sneezed near my melting chocolate (gross, I know) and boom – seized! The fix? If it’s just slightly grainy, try whisking in a bit of warm vegetable oil. If it’s full-on seized, your best bet is to use it for baking instead.
Next, let’s talk about grainy or crystallized caramel. This usually happens when sugar crystals form during the cooking process. It’s like your caramel decided to become sand at the last minute. Not cool, caramel, not cool. To prevent this, make sure all your equipment is squeaky clean before you start, and avoid stirring the caramel until the sugar has completely melted. If it does crystallize, you can try adding a bit of corn syrup to smooth it out. Or do what I did once in desperation – turn it into praline and pretend that was your plan all along!
Chocolate bloom is another common issue. This is when your beautiful, glossy turtles develop a whitish film on the surface. It looks like your chocolates have seen a ghost! Don’t panic – it’s perfectly safe to eat, just not as pretty. Bloom usually happens when chocolate is stored at inconsistent temperatures. I once left a batch of turtles in my car on a warm day (rookie mistake) and came back to find them looking like they’d been dusted with powdered sugar. Not exactly the look I was going for! To prevent bloom, store your turtles in a cool, dry place with a consistent temperature. And resist the urge to refrigerate them – the sudden temperature changes can cause condensation, leading to bloom.
Now, let’s talk about consistency issues. Ever made a batch of turtles that spread out like a chocolate pancake? Yeah, me too. This usually means your caramel is too soft. The fix? Cook it a bit longer next time, or try reducing the amount of cream or butter in your recipe. On the flip side, if your caramel is too hard (hello, dental work!), you probably overcooked it. Try taking it off the heat a bit earlier in your next batch.
Lastly, let’s address the elephant in the room – ugly turtles. We’ve all been there. You had visions of perfectly shaped, glossy turtles, but ended up with… well, let’s just say they have a face only a mother could love. Don’t sweat it! Remember, taste trumps appearance every time. And if anyone comments, just call them “rustic” or “artisanal”. Works like a charm!
Creative Variations on Traditional Turtle Chocolate
Alright, turtle adventurers, ready to walk on the wild side? Let’s talk about shaking up the classic turtle recipe with some creative twists!
First up, flavor infusions. Want to add a little zing to your turtles? Try sprinkling some sea salt on top before the chocolate sets. I did this once by accident (I have a lot of happy accidents in my kitchen, apparently), and it was a game-changer! The salt enhances the sweetness of the caramel and adds a lovely crunch.
Or how about some espresso powder in your chocolate? It adds a subtle coffee flavor that pairs beautifully with the nuts and caramel. Just a word of warning – I once got a bit overzealous with the espresso and ended up with turtles that packed quite a caffeinated punch. My family was buzzing for hours!
Speaking of nuts, why stick to just pecans? I’ve experimented with all sorts of nuts in my turtles. Macadamia nuts add a tropical twist, while pistachios bring a lovely green color and unique flavor. I even tried using peanuts once for a PB&J inspired turtle – it was… interesting. Let’s just say some experiments work better than others!
For you chocolate rebels out there, why not try marbling different types of chocolate? I love swirling dark and white chocolate together for a visually stunning (and delicious) twist on the classic turtle. Fair warning though – it can get messy. The first time I tried this, I ended up looking like a dalmatian with chocolate spots all over me!
And let’s not forget about shaped turtles! Silicone molds are your friends here. I once made heart-shaped turtles for Valentine’s Day, and they were a hit. Well, mostly. My attempt at turtle-shaped turtles ended up looking more like chocolate blobs. But hey, they still tasted great!
Remember, the key to successful variations is to start small. Don’t try to change everything at once, or you might end up with something that’s more “what is that?” than “wow, that’s amazing!”. Trust me, I learned this the hard way when I tried to make vegan, sugar-free, nut-free turtles. Let’s just say it wasn’t my finest culinary moment!
Storing and Packaging Your Homemade Turtle Chocolate
Alright, turtle protectors, let’s talk about keeping your delicious creations fresh and presentable. Because let’s face it, as tempting as it is to devour all your turtles in one sitting (no judgment here!), sometimes you need to save some for later. Or, you know, share them with other people. If you’re into that sort of thing.
First things first – storage. The enemy of perfectly tempered chocolate is temperature fluctuation. I learned this the hard way when I stored a batch of turtles in my garage, thinking the cool temperature would keep them fresh. Spoiler alert: it didn’t. I ended up with a box of sad, bloomed turtles that looked like they’d been through a chocolate blizzard.
The ideal storage spot for your turtles is a cool, dry place away from direct sunlight. A pantry or cupboard works great. If you live in a particularly warm climate (hello, fellow Texans!), you might need to resort to refrigeration. Just make sure to bring them to room temperature before serving to avoid condensation.
Now, let’s talk shelf life. Properly stored, your homemade turtles should last about 2-3 weeks. But let’s be real – in my house, they rarely make it past day three! If you’re using fresh cream in your caramel, you’ll want to err on the shorter side of that range.
Packaging is where you can really let your creativity shine! I love using clear cellophane bags tied with a pretty ribbon. It shows off your beautiful turtles and makes them look professional. Plus, it’s perfect for gift-giving. Just be careful when tying the ribbon – I once got a little too enthusiastic and squished an entire batch. Oops!
For a more eco-friendly option, try using small kraft paper boxes. They’re recyclable and give your turtles a rustic, artisanal vibe. I once packaged some turtles in tiny mason jars for a wedding favor. They looked adorable, but I may have underestimated how long it would take to fill 200 jars. Let’s just say I developed a newfound respect for assembly line workers that day!
Don’t forget about labeling! Even if you’re just storing them for yourself, it’s helpful to note the date you made them. And if you’re giving them as gifts, a cute label with the flavor and ingredients is a nice touch. I once forgot to label a batch of spicy chili-infused turtles. Let’s just say my sweet-toothed aunt got quite a surprise!
Remember, presentation matters. A beautifully packaged turtle can elevate it from a simple treat to a gourmet gift. But at the end of the day, it’s what’s inside that counts. Even if your packaging isn’t perfect, those delicious turtles will still bring a smile to anyone’s face. Well, unless you forgot to remove the shells from the pecans. Not that I’ve ever done that. Twice.
Health Considerations and Dietary Adaptations
Alright, health-conscious turtle lovers, let’s talk about making these decadent treats a bit more guilt-free. Because let’s face it, as much as we’d like to believe otherwise, a diet consisting solely of turtle chocolates probably isn’t doctor-recommended. (Though I’m willing to volunteer for that clinical trial!)
First, let’s address the elephant in the room – or should I say, the turtle in the room? Traditional turtle chocolates aren’t exactly a health food. They’re high in sugar, fat, and calories. But before you despair, remember that a little indulgence now and then is part of a balanced lifestyle. It’s all about moderation, folks!
That being said, there are ways to make your turtles a bit healthier without sacrificing taste. One option is to use dark chocolate instead of milk chocolate. Dark chocolate has less sugar and more antioxidants. Plus, it gives your turtles a sophisticated flavor that’ll make you feel fancy even if you’re eating them in your pajamas (not that I’ve ever done that… okay, maybe once or twice).
For my sugar-conscious friends out there, there are ways to make lower-sugar turtles. You can use sugar alternatives like stevia or erythritol in your caramel. Fair warning though – my first attempt at sugar-free caramel ended up more like caramel-flavored chewing gum. It took some trial and error to get it right!
Now, let’s talk about vegan and dairy-free options. You can use coconut milk instead of cream in your caramel, and there are some great vegan chocolate options out there. I once made a batch of vegan turtles for a friend, and they were a hit! Even my die-hard dairy-loving uncle couldn’t tell the difference (don’t tell him, he’s still bragging about his superior taste buds).
For my nut-free friends, you’re not left out of the turtle party! You can use seeds like pumpkin or sunflower instead of nuts. I once made a batch with roasted chickpeas – they were… interesting. Let’s just say that experiment won’t be repeated, but hey, you never know until you try!
Remember, even with these adaptations, turtle chocolates are still a treat. They’re not meant to replace your kale smoothie (although, between you and me, I know which one I’d prefer). The key is to enjoy them mindfully and savor every bite.
And hey, if you’re going to indulge, why not make it count? Use high-quality ingredients, take the time to really enjoy your turtle, and share them with friends and family. Because at the end of the day, the joy and connection that come from sharing a homemade treat? That’s the healthiest ingredient of all.
Conclusion
Whew! We’ve been on quite the turtle chocolate journey, haven’t we? From the basics of what makes a turtle a turtle, to troubleshooting those pesky chocolate mishaps, we’ve covered it all. And hopefully, we’ve had a few laughs along the way – because let’s face it, if you can’t laugh at yourself covered in chocolate and caramel, what can you laugh at?
Remember when we started this adventure? You might have been thinking, “Can I really make these at home?” And now look at you! You’re a bonafide turtle chocolate expert. You know your tempered chocolate from your bloomed chocolate, your soft-ball stage from your hard-crack stage. You’re practically ready to open up your own turtle chocolate shop! (Just remember to invite me to the grand opening, okay?)
But here’s the real secret to making amazing turtle chocolates: it’s not about perfection. It’s about enjoying the process, learning from your mistakes, and sharing the results with the people you love. Whether your turtles come out looking like they belong in a fancy chocolate shop or like they’ve been through a chocolate avalanche, they’re yours. You made them. And that makes them special.
So go forth and experiment! Try that crazy flavor combination you’ve been dreaming about. Attempt that intricate decorating technique. Share your creations with friends, family, or hey, just enjoy them all yourself while binge-watching your favorite show. I won’t judge.
And remember, if all else fails and your turtles don’t turn out quite as planned, just call them “rustic” or “artisanal” and pretend that’s exactly what you were going for. Works every time!
Now, if you’ll excuse me, all this talk about turtle chocolates has made me crave some. I think it’s time for a little “quality control” taste test. In the name of research, of course!
Happy turtle-making, everyone! May your chocolate always be tempered, your caramel always be gooey, and your nuts always be perfectly toasted.
Turtle Chocolate Recipe
Ingredients
- 8 ounces pecan halves I used roasted, lightly salted
- 25 caramel squares unwrapped (about 1 heaping cup)
- ¼ cup cream or half-and-half divided
- About 16 ounces roughly chopped chocolate melted (I used 8 ounces dark and 8 ounces milk, both Trader Joe’s Pound Plus bars)
- Sea salt optional for sprinkling
Instructions
- Line two baking sheets or large platters with parchment paper, ensuring they fit in either the fridge or freezer.
- Arrange small piles of pecans (about 5 to 6 pieces per pile), slightly overlapping them to minimize gaps and prevent the caramel from seeping through.
- In a medium microwave-safe bowl, combine the caramels and half of the cream (reserve the rest) and microwave on high until melted. This should take about 3 to 4 minutes, but stop and stir every 30 seconds to avoid burning. Alternatively, melt the caramels on the stovetop over low heat, stirring frequently. **(See notes below for more on melting caramels.)
- Spoon about 1 tablespoon of caramel over each pecan pile and set aside.
- In another medium microwave-safe bowl, add 8 ounces of chocolate and microwave on high for about 1 minute, stirring every 15 seconds until smooth. Work in small batches to prevent overheating—melt more chocolate as needed.
- Drizzle about 2 tablespoons of melted chocolate over each pecan cluster, letting it cascade down the sides.
- Optionally, sprinkle a pinch of sea salt over each Turtle.
- Let the Turtles set at room temperature (this can take several hours) or speed up the process by placing them in the fridge or freezer for about 15 minutes before serving.